This post contains affiliate links. If you sign up through my links, I may earn a commission at no extra cost to you. I only recommend tools I genuinely use and believe in.
Let me tell you something that stopped me in my tracks when I first discovered it.
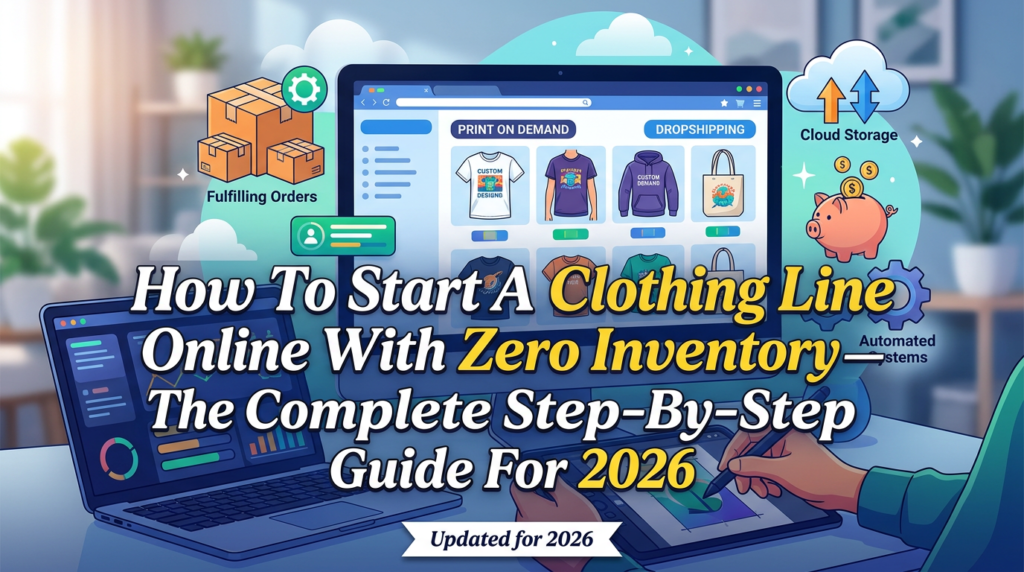
You can design a t-shirt right now today put it up for sale on the internet, and never touch a single piece of fabric, never ship a single box, never rent a warehouse, and never spend a cent on inventory.
Someone in Germany buys that shirt. A printing facility prints it. They ship it straight to the customer. You collect the profit.
That’s print-on-demand (POD), and it is one of the most accessible and genuinely scalable income streams available to anyone with a laptop and a Wi-Fi connection.
I want to be honest with you, though because I hate it when guides just sell you a dream.
Print-on-demand is not a get rich quick scheme. You won’t make $10,000 in your first month. There are real hurdles, real mistakes to avoid, and a real learning curve if you want to do it properly. But when it works? It works beautifully. And once a design is selling, it can keep selling for months or years with almost zero effort from you.
This guide is going to take you through everything. From the very first idea in your head, to your first sale, to scaling it into a real income stream. I’m going to share things that most courses charge hundreds of dollars to teach you for free, right here.
Ready? Let’s get into it.
What Is Print on Demand and How Does It Actually Work?
Before we get into strategy and tools, let’s make sure you understand the mechanics because understanding how it works is what helps you make smart decisions later.
Print-on-demand is a fulfilment method. Here’s the step-by-step of what actually happens when someone buys one of your products:
- A customer visits your store (on Etsy, Shopify, your own website, wherever)
- They buy a product let’s say a t-shirt with your design
- The order automatically passes to your print-on-demand provider (like Printify)
- Printify’s print facility prints your design on the blank shirt
- They package and ship it directly to your customer
- You receive the difference between what the customer paid and what Printify charged you to fulfil it
That’s your profit. No inventory. No shipping labels. No boxes in your living room.
The most important thing to understand is this: you are in the business of design and marketing, not manufacturing. Your job is to create designs people want to buy and put them in front of the right people. Everything else is handled for you.
Why Print on Demand Is Worth Your Attention Right Now
People have been selling POD products since the early 2010s, and you might wonder if the market is saturated. It is not. Here’s why:
The global custom t-shirt printing market was valued at over $4 billion and is growing every year. New niches emerge constantly. New audiences form around new interests, new TV shows, new sports teams, new cultural movements. There is always a fresh group of passionate people looking for merchandise that speaks to their identity and right now, most of those niches are underserved.
The other thing that makes this a great time to start? The tools have never been better. AI design tools, mockup generators, research software all of it has matured massively in the last few years. A solo creator with good taste and a smart niche strategy can compete with companies 10 times their size.
The Tools You Actually Need (And the Ones You Don’t)
One of the biggest mistakes new POD sellers make is tool overload. They sign up for a dozen platforms, try to be everywhere at once, and then burn out. Let me save you that pain.
Here are the essential tools and what each one is actually for.
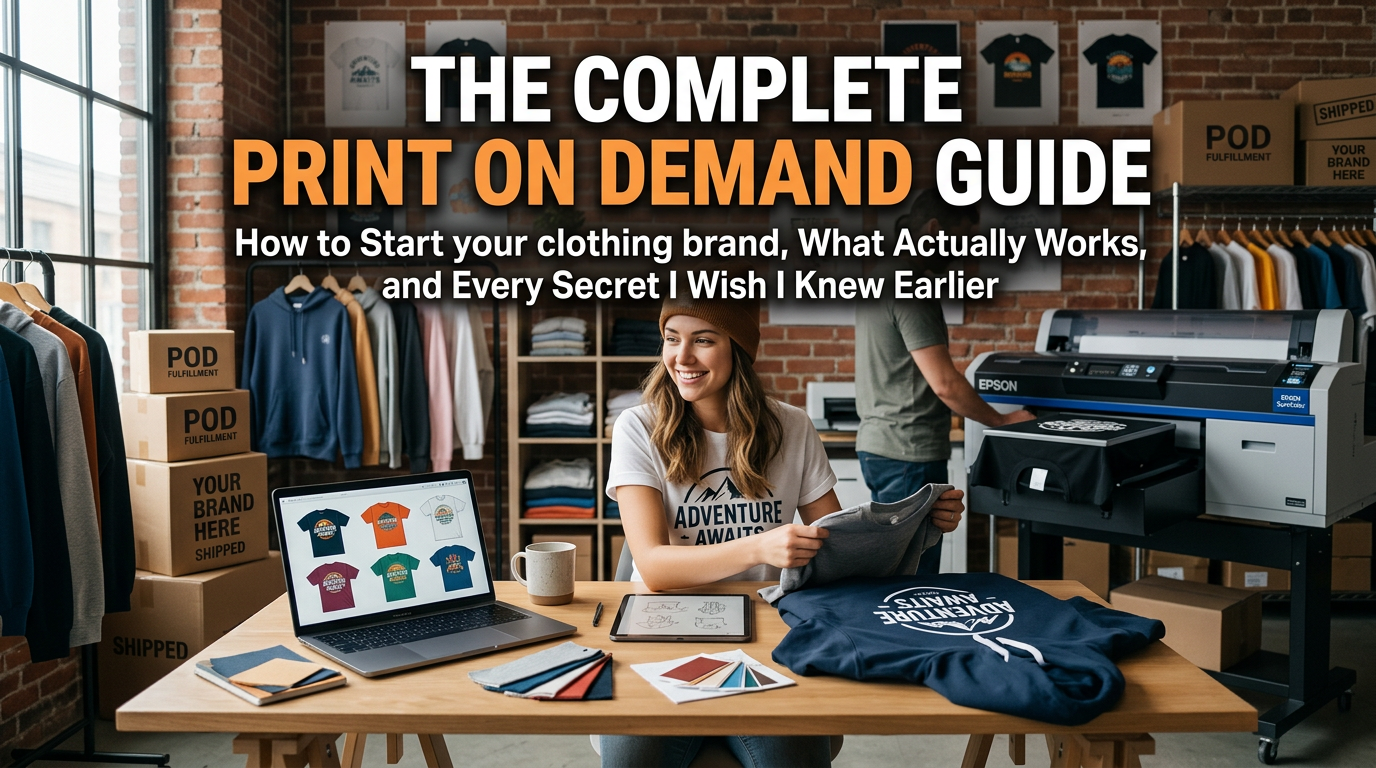
1. Printify Your Print on Demand Backbone
Printify is my top recommendation for print on demand fulfilment, and here’s why it beats the competition.
Printify is not just one print facility it’s a network of print providers around the world. When you list a product, you choose which print provider fulfils it. This matters enormously because:
- You can choose the provider closest to your main customer base. If most of your buyers are in the US, pick a US-based provider for faster shipping and lower costs. If you’re selling to Europeans, there are European facilities available.
- You can switch providers without rebuilding your products. If one provider has a quality complaint, you move to another.
- The product catalog is enormous. T-shirts, hoodies, mugs, phone cases, tote bags, posters, journals, pillows, caps, leggings, socks, dog bowls, cutting boards, beach towels — Printify has over 900 products. This lets you expand your shop without switching platforms.
Printify also has a free plan, which is where everyone should start. You only pay the base product cost when an order comes in there is no monthly fee to just have your products listed.
When your sales grow, Printify’s Premium plan (around $29/month) gives you 20% off all products, which significantly improves your margins. Don’t pay for it until you’re already making consistent sales.
One critical thing: When you sign up for Printify, take time to order samples of your products before you launch. Pay the few dollars it costs. Wear the shirt. Hold the mug. Feel the print quality. I can’t stress this enough. Selling a product you’ve never touched is how you end up with negative reviews and refund requests.
2. A Storefront Where Your Products Live
You need somewhere to sell. Here are your main options and when to use each:
Etsy is where I recommend everyone start. Etsy already has millions of buyers searching for custom, unique, handmade-style products every single day. You don’t have to build your own traffic from scratch. Listing fees are $0.20 per listing, and Etsy takes a transaction fee, but the built-in audience is invaluable when you’re starting out. Etsy and Printify integrate directly when someone buys on Etsy, Printify auto-fulfils.
Shopify is for when you’re ready to build a real brand. Shopify gives you full control your own domain, your own customer data, your own email list. The downside is that you’re responsible for all your own traffic. There’s no built-in marketplace. This is a step up, not a starting point.
Amazon Merch on Demand is Amazon’s own POD programme and gives you access to Amazon’s enormous buyer base. It’s invite-only and takes time to get accepted, but it’s worth applying. You don’t use Printify for Amazon Merch Amazon handles fulfilment themselves. But it’s a powerful complementary channel.
Redbubble and Teepublic are marketplace platforms similar to Etsy — you upload designs, they handle everything including fulfilment. The margins are very low, and you have almost no control over the customer relationship. These work best for building passive design exposure, not as a primary business strategy.
My honest advice: Start on Etsy with Printify. Get your first 10–20 sales. Learn what your customers respond to. Then consider expanding to Shopify or Amazon.
3. Design Tools Creating Products That Actually Sell
You do not need to be a professional graphic designer to succeed at POD. I know sellers making serious money who learned everything on YouTube and use free tools. Here’s the toolkit:
Canva (free/Pro) is the most accessible design tool for POD beginners. It has a massive library of fonts, elements, and templates. It’s not the most powerful tool, but it gets you selling fast. Canva Pro costs around $15/month and unlocks a much bigger asset library worth it once you’re making sales.
Adobe Illustrator is the industry standard for print-ready vector designs. If you’re serious about POD long-term, learning Illustrator is an investment that pays off. Designs created in Illustrator scale to any size perfectly, which means sharp prints every time.
Kittl is a newer tool that’s become very popular specifically for POD. It’s built around vintage, retro, and typographic designs which happen to be some of the best-selling styles on Etsy. It has templates that are specifically optimized for POD sizes.
Midjourney and Adobe Firefly AI image generators have opened up design possibilities for non-designers. You can generate unique illustrations, textures, patterns, and backgrounds that you then use as elements in your designs. Important caveat: You should not sell AI-generated images as-is, without customization. Use them as elements within a larger design. Also research the terms of service for any AI tool you use before selling commercially.
Remove.bg removes backgrounds from images for free. Essential when you’re working with design elements that need transparent backgrounds.
Placeit (subscription) generates professional product mockups. Instead of photographing real products, you upload your design and Placeit places it on a model wearing the shirt, or on a desk with the mug. High-quality mockups are crucial for Etsy performance. Printify also has its own mockup generator, which is free and good enough to start.
4. Research Tools Finding What Will Actually Sell
This is where most beginners skip ahead, and it’s why most beginners struggle. You do not decide what to design based on what you personally like. You find out what is already selling and you create your version of it.
Etsy search bar this free tool is underrated. Start typing a niche or phrase and look at the autocomplete suggestions. Those suggestions are based on real searches. Write them all down.
Marmalead and eRank are Etsy SEO tools. They show you search volume, competition, and trending keywords. I recommend trying the free tier of both before committing to a paid subscription.
EverBee is a product research tool that shows you estimated monthly revenue for Etsy listings. You can look at a competitor’s shop and see which products are actually generating income. This is extremely valuable research data.
Pinterest Trends shows you what visual aesthetics and design styles are trending. This helps you stay ahead of the design curve rather than chasing outdated trends.
Google Trends is free and powerful for validating niche ideas. Type in a niche and see if interest is growing, declining, or seasonal.
Finding Your Niche: The Most Important Decision You’ll Make
If there’s one thing I want you to tattoo on your brain before you design a single product, it’s this: the riches are in the niches.
A general shop selling generic motivational t-shirts is going to struggle. A shop selling t-shirts specifically for left-handed veterinary nurses who love golden retrievers? That’s a niche. That seller has almost no competition, and their customer — when they find the shop — feels like the product was made exactly for them.
The most successful POD sellers I’ve studied have one thing in common: they go deep into specific communities rather than trying to appeal to everyone.
Here’s how to find your niche:
The Passion-Plus-Community Formula
The best niches combine a strong passion or identity with a real community around it. Think about:
- Professions and occupations: Teachers, nurses, accountants, electricians, firefighters, veterinarians. These communities are huge, they’re passionate about their identity, and they buy merchandise regularly.
- Hobbies and sports: Running, CrossFit, fishing, gardening, chess, embroidery, kayaking. Passionate hobbyists love wearing their hobby.
- Pet ownership by breed: “Golden retriever mom” shirts are a cliché for a reason they sell. But go more specific: “Frenchie dad who works nights” is less competitive.
- Cultural identity: People are proud of their heritage and their communities. This is a space to approach with genuine respect and knowledge if you’re designing for a community you’re part of, you’ll do it authentically.
- Fandoms and interests: Be careful here. You cannot use copyrighted characters, trademarked logos, or licensed designs. But fan niches can be approached through the emotion and language of a fandom without copying IP.
Validating Your Niche Before You Design Anything
Before you spend hours designing products for a niche, spend 30 minutes validating it.
Go to Etsy and search for products in that niche. Are there results? Good that means people are buying. Are the top sellers making lots of sales (you can often see sale counts on Etsy listings)? Even better.
Now look at the quality of the competition. Are the designs generic and low-effort? That’s an opportunity. Are all the shops using similar styles and you have a fresh angle? That’s an opportunity.
If you search a niche and find almost no results, that’s a warning sign it might mean there’s no demand, not that you’ve discovered a blue ocean.
Designing Products That Actually Sell
Once you know your niche, it’s time to design. Here are the principles that separate selling shops from struggling ones.
Design Styles That Consistently Perform Well
Through research and studying successful POD shops, certain design styles come up again and again as top performers. These include:
Vintage and retro designs: That faded, worn-in aesthetic resonates with a huge audience. Distressed textures, vintage typography, sun faded color palettes. Tools like Kittl make these easier to create.
Typographic designs: Powerful quotes, funny sayings, bold single-word statements. These are often the most scalable because you can swap out a word and suddenly you have a design for a completely different niche.
Minimalist line art: Clean, simple line illustrations in a single color on a solid background. These print extremely cleanly and look sophisticated.
Nature and botanical: Plants, mountains, oceans, forests. The outdoors aesthetic is consistently popular and works across a wide range of niches.
Bold graphic tees: High contrast, strong typography, statement designs. These photograph well and perform well in thumbnail-heavy environments like Etsy.
The Technical Requirements That Will Make or Break Your Prints
This section is where a lot of beginners make expensive mistakes, so please read carefully.
Resolution matters enormously. Print-on-demand products need high-resolution files usually 300 DPI (dots per inch) at the print size. If you design at 72 DPI (the default for web graphics), your prints will be blurry and pixelated. This is the number one quality complaint from POD sellers.
When designing in Canva for a standard t-shirt front, create your canvas at 4500 x 5400 pixels (Printify’s recommended dimensions for direct-to-garment t-shirts). This gives you a sharp print at full chest size.
Use PNG files with transparent backgrounds for most apparel designs. This tells the printer to print only your design, not a white rectangle behind it. If you want a design with a solid background, make the background match the garment color but this is risky because colors look different on screen versus fabric.
Color mode matters. Your screen uses RGB color (Red, Green, Blue). Printers use CMYK (Cyan, Magenta, Yellow, Key/Black). Colors can look different after printing, especially vibrant neons and certain blues. Printify has color guides for each print method read them.
Understand the two main print methods:
- Direct to Garment (DTG) is best for complex, multi-color designs. It’s like an inkjet printer for fabric. Great for photographs, illustrations with lots of colors, gradients. Works best on cotton.
- Direct-to-Film (DTF) offers very vivid colors and works on more fabric types. More durable than DTG in some cases.
- Screen printing (for bulk orders) isn’t usually available through POD this is for traditional manufacturing.
- Embroidery is available on Printify for caps and some apparel. Designs need to be simplified embroidery doesn’t handle fine details well. Maximum thread count limits apply.
- Sublimation is used for all-over-print products (where the design covers the entire garment) and for items like mugs and phone cases. Designs must be built specifically for the template shape.
Always and I cannot say this enough order a sample before listing. A $15 sample that prevents $500 in refunds is the best investment you’ll make.

Setting Up Your Etsy Shop for POD Success
Your Etsy shop is not just a place to list products. It’s a brand. Here’s how to set it up right.
Choosing Your Shop Name
Pick a name that:
- Is easy to spell and remember
- Hints at your niche or your aesthetic (not required, but helpful for SEO)
- Doesn’t include brand names or words you don’t own
- Has available social media handles (check before committing)
- Is professional enough that you’d feel comfortable putting it on a business card
Avoid cramming too many keywords into your shop name it looks spammy. “CozyNightDesigns” is better than “BestTshirtMugsGiftsHoodies2024.”
Writing Product Listings That Rank and Convert
Your Etsy listing has two jobs: show up in search, and convince someone to buy. Here’s how to do both.
The title is your most important SEO real estate. Etsy’s algorithm matches search queries to listing titles. Pack your title with the exact phrases your customers are searching for, in natural-sounding order.
Bad title: “Funny Nurse Shirt Gift for Her”
Good title: “Funny Nurse Shirt | ER Nurse Gift | Nursing School Graduation Gift | RN Tshirt | Gift for Nurse | Nurse Life Shirt”
Notice how the good title includes multiple related search phrases? That’s because different customers search differently. You want your listing to show up for as many relevant searches as possible.
Tags (all 13 of them) are crucial. Use every single tag slot. Use multi-word phrases, not single words. Think about how your customer is searching — what words would they type? Include: the product type, the niche, the occasion (gift, birthday, graduation), the recipient (for her, for mom), the style (funny, cute, vintage), and related phrases.
Your description should sell the product AND serve SEO. Write 200–400 words minimum. Describe who this product is for. Describe the design. Describe the sizing (link to your size chart). Describe what they’ll receive and the production timeline. Repeat your key search phrases naturally throughout — not robotically, but woven into real sentences.
Photos are your most powerful conversion tool. On Etsy, customers can’t touch or try your products. Your photos have to do that work. Use:
- A clean, attractive lifestyle mockup as your main image (someone wearing the shirt, the mug on a table with coffee)
- A flat lay showing the design clearly
- A size chart or size comparison
- A close-up of the print quality (once you have samples)
- A “story” photo if your brand has a vibe, a photo that captures it
Printify’s mockup generator gives you free, professional-quality mockups. Use them. Consider also Placeit for lifestyle mockup photos that show real people wearing your designs.
Pricing Your Products Correctly
Pricing is where a lot of new POD sellers undercut themselves into failure. Let me give you a formula.
Your minimum price = (Printify cost) + (Etsy listing fee) + (Etsy transaction fee 6.5%) + (Etsy payment processing ~3%) + (your profit margin)
Let’s run through a real example:
- Printify fulfilment cost for a Bella+Canvas t-shirt: $12.50
- Etsy listing fee: $0.20 (one-time per listing, renews when it sells)
- If you price the shirt at $24.99: Etsy takes 6.5% ($1.62) + 3% processing ($0.75) = $2.37 in fees
- Your profit: $24.99 – $12.50 – $2.37 = $10.12 per shirt
Does $10.12 sound like a lot? Consider that if you get 100 shirt sales in a month, that’s $1,012 in profit for a design you made once.
Important note: do not price yourself at the cheapest option on Etsy. Cheap prices signal low quality. Most successful POD sellers price at the average to slightly above-average for their category. If everyone else is selling at $24.99, sell at $26.99 and compete on design quality, photos, and customer service instead.
Driving Traffic: Getting People to Actually See Your Products
This is the honest, uncomfortable part of POD that most guides rush past.
Etsy has organic search built in, but it takes time sometimes months to rank well. While you’re building that organic ranking, you need to bring traffic yourself.
Etsy SEO (The Long Game)
Etsy’s search algorithm is called “Etsy Search.” It looks at:
- Relevance: How well your title, tags, and description match what a buyer is searching
- Listing quality score: Your click-through rate and conversion rate (how many people who see your listing actually buy)
- Customer experience: Reviews, how quickly you respond to messages, your shop completion score
- Recency: Newer listings often get a temporary boost use this to test new products
The way to build strong Etsy SEO is to:
- Use eRank or Marmalead to find keywords with decent search volume but lower competition
- Fill every title and all 13 tags with relevant phrases
- Continuously add new listings active shops rank better
- Get early reviews even 5–10 reviews dramatically improve conversion rate
Pinterest Massively Underused by POD Sellers
Pinterest is a visual search engine, and it is one of the best free traffic sources for POD shops. Here’s why:
Pinterest pins have a long lifespan a single pin can drive traffic for years. Contrast that with Instagram, where a post is dead in 24 hours.
Create pins for every one of your products. Create boards organized by niche and product type. Use keyword-rich descriptions on every pin. Link each pin directly to the Etsy listing.
Aim to post 10–20 pins per day (Tailwind, a Pinterest scheduling tool, makes this manageable). Within 3–6 months of consistent pinning, you should start seeing meaningful Pinterest traffic.
TikTok and Instagram for POD
Short video is powerful for POD because you can show the product in real life. The best performing POD content on TikTok includes:
- Design process videos (creating the design in Canva or Kittl these get huge engagement)
- “Shop with me” tours of your Etsy shop
- Unboxing videos when your samples arrive
- Reaction content showing funny or relatable designs and letting people engage
You don’t need to show your face. Many POD creators run successful accounts showing only hands, screens, and products.
Etsy Ads When and How to Use Them
Etsy Ads promote your listings in Etsy search results. They can work, but there’s a right way and a wrong way to use them.
The wrong way: Turn on ads on every listing from day one. This burns your budget before you know what converts.
The right way:
- Launch listings organically first. Let them run for 2–4 weeks.
- Look at your stats. Which listings are getting views but no sales? Fix the photos or price. Which are getting both views and sales? Those are your winners.
- Turn on ads only for listings that already have some organic traction and good conversion rates.
- Start with a small daily budget ($3–5) and track your ROAS (Return on Ad Spend). You want to earn at least $3–4 for every $1 you spend on ads before scaling up.
The Hurdles Nobody Warns You About (And How to Clear Them)
This is the section I wish someone had given me when I started. Here are the real obstacles you will face, and how to handle them.
Hurdle #1: Slow Start and the “Dead Listing” Problem
You upload 10 products. Nothing happens. Days pass. Still nothing. This is completely normal.
New Etsy shops have no authority, no reviews, and low ranking. The algorithm needs data — it needs to see that people click on your listings and buy from them — before it starts ranking you well.
The solution: Volume and patience. Successful POD sellers consistently say you need at minimum 50–100 listings before you start seeing consistent sales. More listings = more opportunities to rank for different search terms. Don’t launch 10 listings and wait. Keep adding.
Also: do not start ads immediately. Build organic first.
Hurdle #2: Quality Control and Returns
You will eventually have a customer who receives a product with a print defect — a smear, a mis-aligned placement, a faded color. This is not always your fault. Printing at scale has quality variation.
The solution: Printify has a merchant protection policy. If a product arrives damaged or defective due to a printing error, they will reprint or refund. Document every complaint with photos. File claims promptly.
On your end: set accurate expectations. Your listing should state honest production times (Printify’s average is 2–5 business days for most products, plus shipping time). Don’t promise 3-day delivery and then have a 10-day arrival.
For returns and exchanges, build a policy that is generous enough to protect your reputation but sustainable for you. Most POD sellers do not accept returns for size exchanges (because a customized item can’t be restocked) but will always replace defective items.
Hurdle #3: Design Theft and Copycats
Once your shop starts getting traction, other sellers will copy your best-performing designs. This is one of the most frustrating realities of the POD business.
The solution: Register your original designs with copyright. In the US and many countries, copyright is automatic your original design is protected the moment you create it. But registration gives you stronger legal standing if you need to file a DMCA takedown.
When you see a copy of your design, file a DMCA takedown notice through Etsy’s IP reporting process. Etsy takes these seriously and removes infringing listings.
On the flip side: make sure you’re not doing this to others. Before using any design element, font, or image, verify its license. Some “free” fonts are not free for commercial use. Some stock illustrations have restrictions. Read the license. Always.
Hurdle #4: Intellectual Property Violations (The Big One)
This is the mistake that gets POD sellers’ shops shut down. It is critical and non-negotiable.
You cannot use:
- Any trademarked brand name, logo, or slogan (Nike, Disney, Starbucks, NFL teams, NBA teams, university names and logos)
- Any copyrighted character, artwork, or image (Marvel characters, Disney princesses, cartoon characters)
- Song lyrics, book quotes, or movie quotes (these are copyrighted)
- The likeness or name of any living celebrity
Etsy will take down your listing. In repeat cases, they will shut down your entire shop. Worse, companies actively monitor for this and send cease and desist letters and legal notices.
The good news? You don’t need any of this. The biggest-earning POD shops are built on 100% original designs. Fan niches can be served through the emotion and aesthetic of a fandom without copying the IP. “The Mandalorian” design can’t be listed but a design that says “This Is the Way” in an appropriate font might be (though this specific phrase has been disputed, so always do your own research).
When in doubt, don’t use it.
Hurdle #5: Shipping Expectations and International Orders
POD print times plus shipping times add up. A customer used to Amazon Prime is going to be surprised.
The solution: Be completely transparent in your listings. State the production time (2–5 business days is typical) and the shipping time (3–7 days standard US shipping, 7–21 days international) clearly in your listing description. Set the expectation before they buy.
For high-volume international markets (UK, Germany, Australia), consider choosing a Printify print provider in or near those regions to dramatically reduce shipping times and costs. Printify’s provider network covers the US, UK, Europe, Australia, and more.
Hurdle #6: Profit Margin Pressure
Once you account for Printify’s fulfilment cost, Etsy fees, and any ad spend, your margins can feel thin.
The solution: There are three levers:
First, upgrade to Printify Premium when your sales justify it. The 20% discount across all products directly improves your margins.
Second, focus on higher-margin products. Mugs, tote bags, and phone cases often have better margins relative to their selling price than t-shirts. A mug costs around $5–6 to fulfil and sells comfortably for $18–25. That’s a strong margin.
Third, increase average order value through bundles and upsells. If someone is buying a “teacher mug,” create a matching “teacher tote bag” to cross-sell. Etsy allows you to offer free shipping on orders above a certain amount, which encourages bigger carts.
Hurdle #7: Getting Your First Reviews
Reviews are social proof. Without reviews, conversion rates are low. But getting your first reviews requires sales, and getting sales requires… good conversion rates. It’s a chicken-and-egg problem.
The solution: A few tactics that help:
- Order your own products as real purchases. Leave them as organic sales on your account. You can’t review your own items, but the sale data helps your listing rank.
- Send a follow-up message (within Etsy’s guidelines) after an order ships, thanking the customer and politely mentioning that reviews help small businesses.
- Deliver a product and experience so good that customers want to review it. Fast communication, quick resolution to any problems, a well-packaged product.
- Some sellers use family or friends to make genuine purchases for the sample credit — but never incentivize or manufacture fake reviews. Etsy will remove them and flag your account.
Scaling: From Your First Sales to a Real Income Stream
Once you have a shop with 50+ listings, some early reviews, and your first consistent sales, it’s time to think about scaling.
The 80/20 of Your Catalog
Once you have some data, you’ll find that roughly 20% of your designs generate 80% of your revenue. This is almost universal in POD.
Identify your best sellers. Study why they work is it the niche? The design style? The keywords? The mockup photo? Then create more designs with those same successful attributes. Don’t spread yourself across 10 niches go deeper into the 1–3 niches that are actually working.
Expanding Your Product Line
Once a niche is working, expand the products you offer within it. If your “nurse humor” t-shirts are selling, add:
- Nurse mugs
- Nurse tote bags
- Nurse phone cases
- Nurse magnets
- Nurse greeting cards
A customer who buys your nurse shirt might need a gift for a nursing school graduation — now you can serve that need too. This dramatically increases your revenue per niche.
Opening Multiple Shops
Once your first shop is established, Etsy allows you to open additional shops under different names. Many advanced POD sellers have 3–5 shops, each serving a different niche. This protects you (if one shop has a problem, the others keep going) and lets you go deeper into multiple markets without confusing a single brand.
Adding Your Own Website
When you’re ready, building your own Shopify store gives you freedom that Etsy never can. You own your customer email list. You set your own policies. You can run your own promotions. And you’re not subject to Etsy fee changes or policy updates.
Keep Etsy running as your traffic channel while you build your own site. Never go all-in on any single platform.
Building an Email List
This one is so important. Your Etsy customers are Etsy’s customers — Etsy doesn’t give you their email addresses directly. But you can build your own list through:
- Your own Shopify store (capture emails at checkout)
- A freebie landing page (design templates, wallpapers, or a discount code in exchange for an email)
- Your social media accounts
An email list is the most valuable asset in any online business. I say this because I made this mistake — I didn’t build mine early enough. Don’t repeat my mistake.
A Realistic Timeline for Print-on-Demand Income
I want to give you honest expectations, not hype.
Months 1–2: Set up shop, upload first 20–30 listings, order samples, refine your photos and SEO. Income: likely $0–$50. This is your learning phase. It’s not failure it’s research.
Months 2–4: You’re publishing consistently, reaching 50–75 listings, starting to understand your analytics. You might start seeing sales trickle in. Income: $50–$200/month is realistic.
Months 4–8: SEO is building. Pinterest is starting to send traffic. Your best-selling designs are pulling ahead. Income: $200–$800/month for shops with good niche selection and consistent publishing.
Month 8+: With strong SEO, an established niche, 100+ listings, and consistent marketing, $1,000–$3,000/month is achievable. Some sellers do much more. It depends on niche selection, design quality, and how much time and strategy you put in.
Print-on-demand is not a 30-day miracle. It’s a 12-month business build. Plan for it accordingly.
Your Step-by-Step Launch Checklist
Here’s the exact process to go from zero to your first listing:
Week 1: Foundation
- Sign up for Printify (free plan) at Printify Sign up
- Sign up for Etsy and set up your seller account
- Choose your niche using the research method described above
- Set up Canva or your design tool of choice
- Research 20+ keywords in your niche using eRank (free tier)
Week 2: Design and Production
- Create your first 10 designs (focus on 3 different design styles to test)
- Connect your Printify account to Etsy
- Build your first 10 products in Printify’s product catalog
- Generate mockups for each product
- Order at least 2–3 samples of your most important products
Week 3: Listing and Optimization
- Write optimized titles and descriptions for all 10 products
- Fill in all 13 tags for each listing
- Set competitive pricing using the formula above
- Set your shop policies (shipping, returns, processing times)
- Write your shop bio and fill in all shop sections
Week 4: Marketing Foundation
- Create a Pinterest account for your shop
- Create 3 pins per product and post them
- Make a TikTok or Instagram account for your shop
- Post your first content (design process, product reveal)
- Add 10 more listings to your shop
Repeat weeks 3 and 4 continuously. Consistency is the secret.
Frequently Asked Questions About Print-on-Demand
How much money do I need to start?
Very little. Etsy charges $0.20 per listing (so 10 listings = $2). Printify is free until you make a sale. Canva has a generous free plan. If you’re resourceful, you can start with under $10. Budget $50–$100 to be comfortable, which would cover some design assets and a few sample products.
Do I need a business license?
This varies by country and local jurisdiction, but in most places you can start as a sole proprietor without a formal business registration. As your income grows, consult a local accountant. You will need to track your income for tax purposes from day one.
Can I do POD without a social media presence?
Yes, especially on Etsy where organic search does a lot of the work. But a Pinterest account in particular dramatically accelerates your growth and is worth the time investment.
What are the best-selling POD products?
Consistently strong performers include: t-shirts (especially hoodies in autumn/winter), mugs, tote bags, phone cases, and wall art prints. Seasonal products (Christmas ornaments, Valentine’s Day cards, Halloween shirts) spike around their holidays and can generate significant income in a short period.
Can I do this from outside the US?
Absolutely. Print on demand is location-independent. Printify’s print network fulfils to customers globally, and Etsy ships worldwide. Wherever you are in the world, you can run a POD business targeting US, UK, European, or local customers.
How many designs should I have before I expect sales?
There’s no magic number, but most sellers see their first consistent sales around the 30–50 listing mark. Having more designs gives you more chances to rank for different searches. Aim for 100 listings in your first 6 months.
Final Thoughts: Is Print on Demand Worth It?
Here is my honest, unfiltered answer: yes, for the right person, absolutely.
Print-on-demand is worth it if you’re willing to put in the upfront work without immediate reward. It’s worth it if you’re willing to learn design basics, study your market, and treat it like a real business rather than a vending machine you can ignore after setup.
It is not worth it if you want fast money. It is not worth it if you upload 5 generic designs, wait two weeks, and then declare that it doesn’t work.
What makes POD uniquely powerful is the combination of low startup cost, no inventory risk, and genuine scalability. A design you create today could still be earning you money three years from now. That’s not something you can say about most businesses.
The tools have never been more accessible. Printify’s platform has made the fulfilment side essentially plug-and-play. Canva and Kittl have made design accessible to non-designers. Etsy has built a marketplace of buyers already looking for exactly what you can make.
The opportunity is real. The question is whether you’re willing to build it properly.
If you’re ready to start, sign up for Printify here it’s free, and you can have your first product ready to sell within a few hours of opening your account.
I genuinely believe that print on demand, done with the strategy laid out in this guide, can become a meaningful income stream for you whether that’s a few hundred dollars a month of side income, or the foundation of something much bigger.
The only way to find out is to start.
Have questions about print on demand that I didn’t cover here? Drop them in the comments below I read every single one and answer as many as I can. And if you found this guide helpful, please share it with someone who might benefit from it. That kind of support means the world to a small blog like this one.

I am Latif Saeed Okwan a digital entrepreneur from Accra, Ghana helping Africans build real online income through affiliate marketing, AI tools, and digital business. Every method on TheDiaHub.com has been personally researched with the African reality in mind -no hype.